
Cookbooks
Never Say Never to Dolce
A brand-new collection of 50 approachable homemade desserts – from iconic Cannoli to Dolci al Cucchiaio and more – that proves there’s always room for a little sweetness.
Manuela’s Sweet Temptations
A collection of 50 irresistible dessert recipes, from classic Italian treats to modern favorites—including gluten-free options.
The Complete Italian Cookbook: Essential Regional Cooking of Italy
A collection of 50 irresistible dessert recipes, from classic Italian treats to modern favorites—including gluten-free options.
How to Make Halloween Chocolate-Peanut Butter Spider Cookies
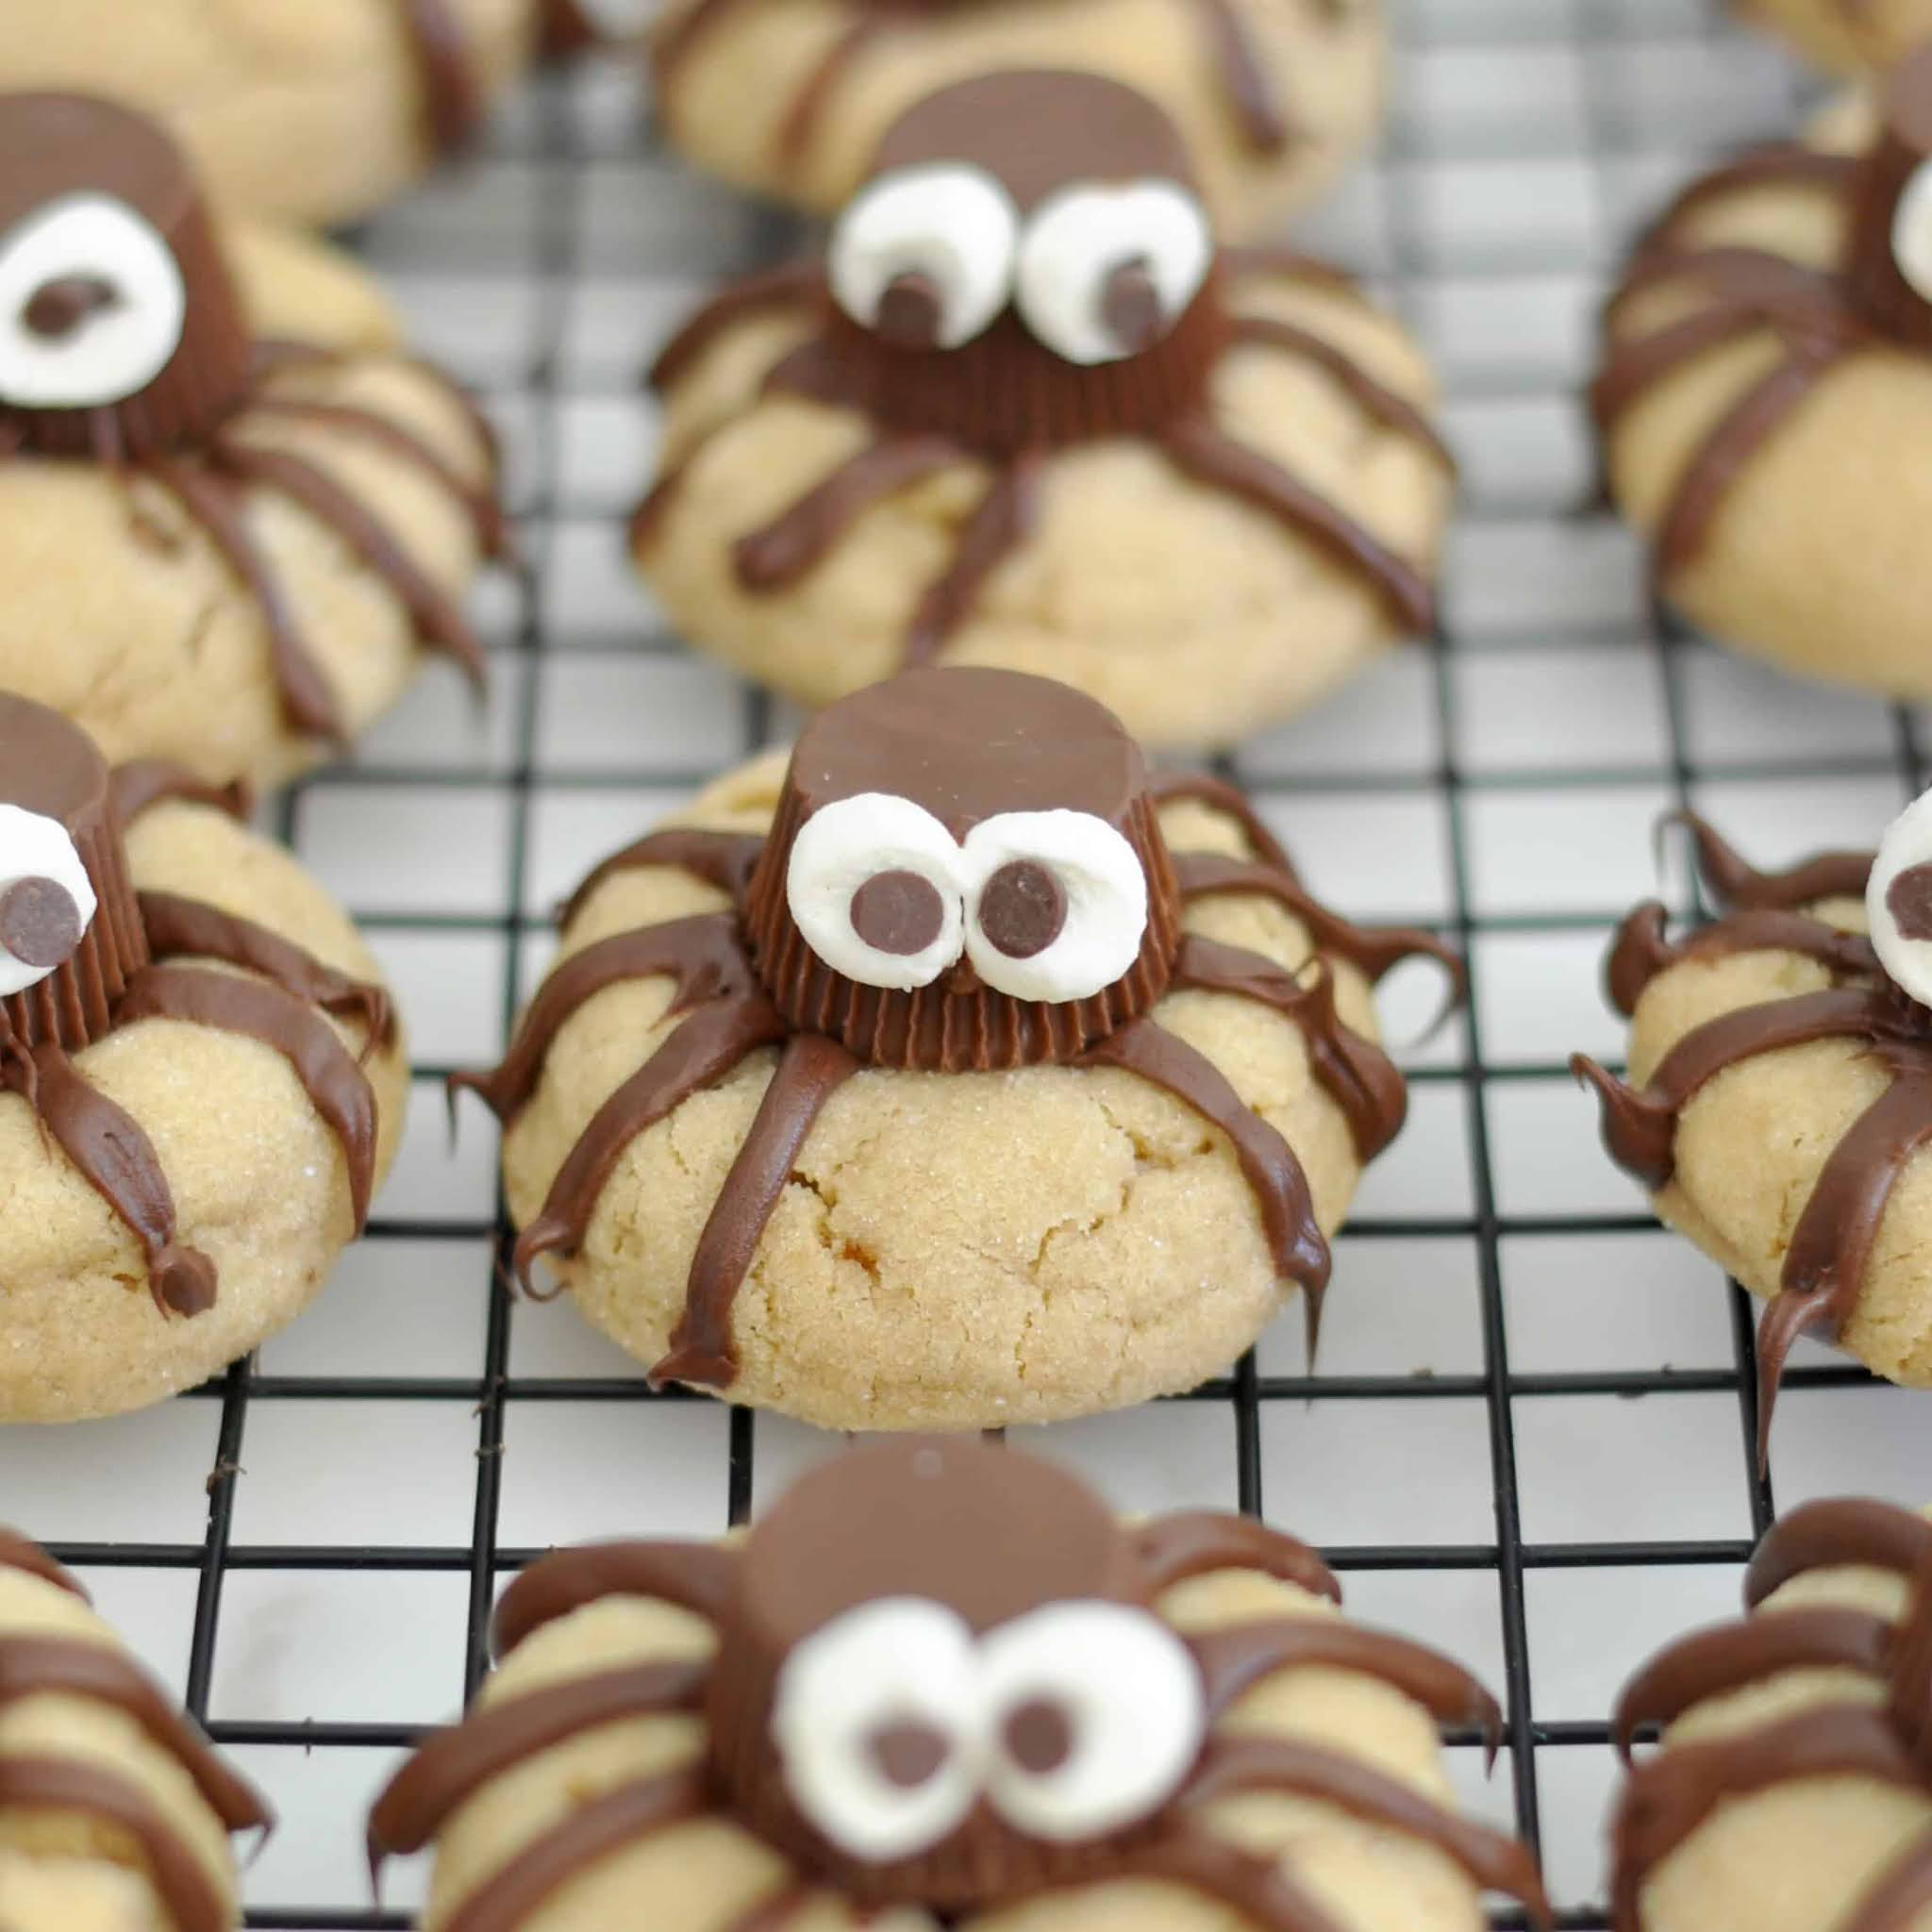
These cute and spooky, thick and soft, chocolate and peanut butter spider cookies are the perfect Halloween treat
Halloween is definitely one of my favorite food holidays. And not just because of the abundance of candies in all shape and sizes that you can easily find this time of the year at any store. What I love the most is to get creative and come up with fun and spooky edible Halloween projects.
And this is what I crafted for you!

So cute, right?!
Your kids are going to love these cookies. So will you, when you see how easy and quick they are to pull together.

And once you taste one, you will experience the mesmerizing combination of peanut butter and chocolate, all in one thick, soft and chewy, incredibly rich cookie. And you will fall in love with this Halloween dessert too!

Can you feel the hypnotizing stare too?!? All these wide-marshmallowy-eyes are looking at me.
Googly eyes are super cute in any treat. You can use store bought eyes for this recipe, but it’s a lot cheaper and I think a lot cuter to make your own.
All you do here is cut mini marshmallows in half using a kitchen scissor. The middle part of the marshmallows is kind of sticky, so that’s where you want to place the mini chocolate chip. Have the pointy tip of the chocolate chip inside the marshmallow, so it will stay put. The eyes are then simply attached to the peanut butter cups with some melted chocolate. So simple, yet super cute!
-

This recipe first appeared on Cooking with Manuela in October 2017
INGREDIENTS:
-
- 4 oz (115 gr) of shortening (or butter at room temperature)
- 1/2 cup (100 gr) of brown sugar
- 1/4 cup (50 gr) of sugar plus 1 or 2 tablespoons for rolling (optional)
- 1/2 cup (135 gr) of peanut butter
- 1 egg
- 1/2 teaspoon of vanilla extract
- 1 1/2 (225 gr) cups of all purpose flour
- 1 teaspoon of baking soda
- pinch of salt
- 24 miniature peanut butter cups (Reese or Trader’s Joe brand)
- 24 mini marshmallows
- 1/2 cup (90 gr) of mini chocolate chips
PREPARATION:
Preheat the oven to 350℉ (175℃).
Cream the butter with the brown and regular sugar until light and fluffy.

Add the peanut butter, the egg, salt and vanilla extract. And mix.

Add the flour and the baking soda, and mix until combined (do not overmix).
Roll the dough into balls (about 1 heaping tablespoon per cookie).

If you’d like, roll the cookie dough balls into granulated sugar. You should get about 24 cookies.

Place on a baking sheet lined with parchment paper. Leave space around each cookie. If you are baking in different batches, refrigerate the dough while waiting to go in the oven.

Bake for 10 to 12 minutes until the top start to slightly crack. Cookies will still look soft, but they will firm up as they cool. When the cookies are just out of the oven, press down the middle of the cookies with something round (like the back of a thick wooden spoon) to flatten out the middle.
Let the cookies cool down on a rack for at least 10 minutes. If they are still warm, they will melt the peanut butter cup that you will put on top.

Prepare the spider eyes by cutting the mini marshmallows in half with a kitchen scissor.

Place a mini chocolate chip in the middle of each eye. You want the tip of the chocolate chip into the middle part of the marshmallow, which is sticky enough to hold the chocolate chip in place. Press the chocolate chip firmly into the marshmallow.

Melt the chocolate chips in a double boiler, or in the microwave ( high for 30 seconds, mix and add 15 seconds if necessary). Pour the chocolate into a piping bag, or zipper bag (cut out one tiny corner).
Decorate your cookies with eight legs (starting from the edges of the cookies and moving to the middle).

Place and upside down peanut butter cup in the middle of the cookie when the chocolate legs are still soft so the peanut butter cup will stick to the cookie and won’t fell off. Press down gently.

Add two little dots of melted chocolate where you want the spider eyes and press the two eyes on the chocolate to attach.

Let the chocolate set completely. You can refrigerate for 10 minutes if you need the chocolate to set quickly.
Store at room temperature in an air tight container. These taste even better after one or two days!


How to Make Halloween Chocolate-Peanut Butter Spider Cookies
These cute and spooky, thick and soft, chocolate and peanut butter spider cookies are the perfect Halloween treat
Servings:
24
Prep Time
40 min
Cook Time
20 min
Resting Time
Total Time
1 hr,
Ingredients
- 4 oz (115 gr) shortening (or butter at room temperature)
- 1/2 cup (100 gr) brown sugar
- 1/4 cup (50 gr) sugar, plus 1 or 2 tablespoons for rolling (optional)
- 1/2 cup (135 gr) peanut butter
- 1 egg
- 1/2 teaspoon vanilla extract
- 1 3/4* (225 gr) cups all-purpose flour
- 1 teaspoon baking soda
- pinch of salt
- 24 miniature peanut butter cups (Reese or Trader’s Joe brand)
- 24 mini marshmallows
- 1/2 cup (90 gr) of mini chocolate chips
Instructions
- Preheat the oven to 350℉ (175℃).
- Cream the butter with the brown and regular sugar until light and fluffy.
- Add the peanut butter, the egg, salt and vanilla extract. And mix.
- Add the flour and the baking soda, and mix until combined (do not overmix).
- Roll the dough into balls (about 1 heaping tablespoon per cookie).If you’d like, roll the cookie dough balls into granulated sugar. You should get about 24 cookies.
- Place on a baking sheet lined with parchment paper. Leave space around each cookie. If you are baking in different batches, refrigerate the dough while waiting to go in the oven.
- Bake at 350℉ (175℃) for 10 to 12 minutes until the top start to slightly crack. Cookies will still look soft, but they will firm up as they cool. When the cookies are just out of the oven, press down the middle of the cookies with something round (like the back of a thick wooden spoon) to flatten out the middle. Let the cookies cool down on a rack for at least 10 minutes. If they are still warm, they will melt the peanut butter cup that you will put on top.
- Prepare the spider eyes by cutting the mini marshmallows in half with a kitchen scissor. Place a mini chocolate chip in the middle of each eye. You want the tip of the chocolate chip into the middle part of the marshmallow, which is sticky enough to hold the chocolate chip in place. Press the chocolate chip firmly into the marshmallow.
- Melt the chocolate chips in a double boiler, or in the microwave ( high for 30 seconds, mix and add 15 seconds if necessary). Pour the chocolate into a piping bag, or zipper bag (cut out one tiny corner).
- Decorate your cookies with eight legs (starting from the edges of the cookies and moving to the middle). Place an upside down peanut butter cup in the middle of the cookie when the chocolate legs are still soft so the peanut butter cup will stick to the cookie and won’t fell off. Press down gently.
- Add two little dots of melted chocolate where you want the spider eyes and press the two eyes on the chocolate to attach.
- Let the chocolate set completely. You can refrigerate for 10 minutes if you need the chocolate to set quickly.
- Store at room temperature in an air tight container. These taste even better after one or two days!